My Swedish made three stage pump came without literature as to how to use it and care for it. Having it quit building air pressure, after about 5,000 strokes, led me to inspect it carefully and discover the base to be a little wobbly in relation to the shiny tube that attaches to it. Here's what I've learned about how it's put togeather, how it comes apart, and what's going wrong with mine. Please keep in mind, this is only my reasoning, based on my personal experience with this pump.
Taking it apart.
1.Lay it down on a clean table. Remove the little socket head screw that comes in the side of the blue tube at the top. It holds the head on. Slide the head out a few inches. Watch out for a little pin that connects the head to the 3rd. stage piston rod. If the pin doesn't fall out on it's own, push it out. Rotate the head down so a little ball can fall out of the hole the 3rd. stage piston rod just came out of. That's the inlet check valve. Mine looks like plastic and has no spring. Don't loose anything.
2.Next, the blue tube is unscrewed from the brass ring at it's bottom. No means of holding onto either the tube or the fitting is provided on my pump. When I looked closely, I could see little indentions left by assembly pliers on the brass fitting. I wrapped a rag around the brass fitting to protect it from my pliers, and grasped the blue tube with my hand, and was able to unscrew them from one another. Slide the blue tube off the pump, being gentle as the threads must pass over some "O" rings at the top.
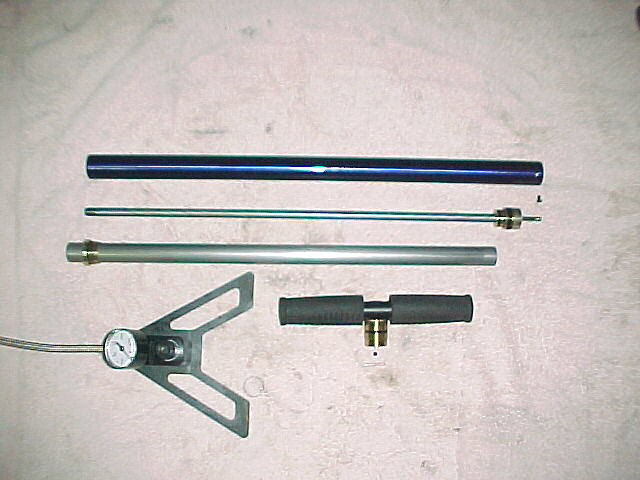
3.What's left, is a shiny tube that is captured between the bottom of the pump and the brass head that you see, with all the "O" rings on it. The brass head is actually only attached to another, smaller, tube that's inside the shiny one and has threads at it's bottom that screw into the bottom of the pump. The smaller tube is the 3rd. stage cylinder. This small tube/brass head assembly functions as a draw bolt to hold everything togeather. Mine was loose.
First, I tried hand tightening it which only lasted for 200 strokes or so before coming loose again. The second time I used padded pliers on the top of the brass head but not vigorously as I didn't want to score the brass if the grip of the pliers slipped and the teeth plunged through the cloth padding. This only lasted about 200 strokes. Then I realized that every failed attempt results in more deterioration of the aluminum that the tube seats on when strokes occur during the time that the draw bolt has relaxed it's hold on the shiny tube. I'm waiting on some literature from the maker, which may indicate a solution, before trying again.
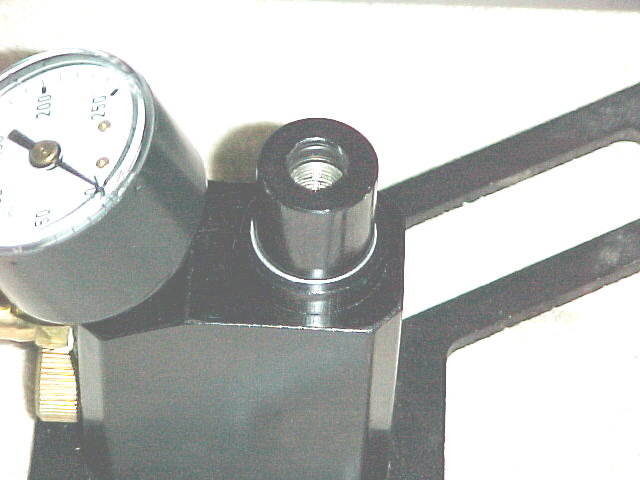
The bottom picture shows the wear that is occuring where the bottom of the shiny tube seats, as a result of the center draw bolt working loose, allowing the tube to rock back and forth, while pumping. The white ring, that is visible, is where the shiny tube is wearing it's way into the black anodized aluminum piece that is screwed into the pump base and functions to position the bottom of the shiny tube. The inside diameter of the shiny tube is .004 inch larger than the the outside diameter of the shoulder that it fits over. As a result of the rocking back and forth, the bottom of the shiny tube has become enlarged by several more thousandths of an inch in diameter where it contacts the shoulder inside it.
Dan Clarke 28 March 01
Update
I now have about 3000 strokes on the pump since I tightened it as tightly as I could with a rubber strip wrapped around the brass head using water pump pliers. It hasn't loosened yet. I decided it would just be easier to figure it out myuself than to wait for information from the maker.
At the Reno Airgun show two days ago, I saw the newest pumps offered by Airguns of Arizona. They appear to be the same as this one, with the exception that the brass ring at the bottom of the blue tube is hex shaped instead of round so that a wrench may be used. The outlet valve, which is the shouldered part that screws into the base and is the locator for the bottom of the shiny tube is also hex shaped. Not being able to see the insides of this newer version, I can only speculate that the shape of the brass head has also been changed to accomodate the use of a wrench of some sort.
Last fiddled with 18 Aug. 01. Click here to go back one page.